环境准备
1
2
3
|
[root@confluence ~]# cat /etc/redhat-release
CentOS Linux release 7.8.2003 (Core)
[root@confluence ~]# yum install -y java-1.8.0-openjdk unzip
|
安装Mysql
confluence 需要依赖数据库,支持Mysql、PostgreSQL、Orace等各种数据库,详细信息可以看下这里。
这里我选用Mysql 5.7。
-
配置mysql yum 源
1
|
[root@confluence ~]# rpm -ivh https://dev.mysql.com/get/mysql57-community-release-el7-11.noarch.rpm
|
-
安装
1
|
[root@confluence ~]# yum install -y mysql-community-server
|
-
启动服务并设置开机启动
1
|
[root@confluence ~]# systemctl enable mysqld && systemctl start mysqld
|
-
查看默认root密码
1
2
|
[root@confluence ~]# grep 'root@localhost' /var/log/mysqld.log
2020-06-29T14:37:06.721631Z 1 [Note] A temporary password is generated for root@localhost: hREXiyA#(79X
|
-
修改密码
1
2
3
4
5
6
7
8
|
[root@confluence ~]# mysql -uroot -p'hREXiyA#(79X'
mysql> ALTER USER 'root'@'localhost' IDENTIFIED BY 'root@mysql';
ERROR 1819 (HY000): Your password does not satisfy the current policy requirements
#提示密码不符合策略
mysql> set global validate_password_policy=0;
Query OK, 0 rows affected (0.00 sec)
mysql> ALTER USER 'root'@'localhost' IDENTIFIED BY 'root@mysql';
Query OK, 0 rows affected (0.00 sec)
|
-
配置,参考官方文档
 1
 2
 3
 4
 5
 6
 7
 8
 9
10
|
[root@confluence ~]# vim /etc/my.cnf
[mysqld]
...
character-set-server=utf8mb4
collation-server=utf8mb4_bin
default-storage-engine=INNODB
max_allowed_packet=256M
innodb_log_file_size=2GB
transaction-isolation=READ-COMMITTED
binlog_format=row
|
1
2
|
   重启服务使用配置生效
   [root@confluence ~]# systemctl restart mysqld
|
-
创建confluence数据库和用户
1
2
3
4
|
mysql> CREATE DATABASE confluence CHARACTER SET utf8mb4 COLLATE utf8mb4_bin;
Query OK, 1 row affected (0.00 sec)
mysql> GRANT ALL PRIVILEGES ON confluence.* TO 'confluence'@'localhost' IDENTIFIED BY 'confluence@password';
Query OK, 0 rows affected, 1 warning (0.00 sec)
|
安装Confluence
-
安装包准备
-
赋予安装文件可执行权限
1
|
[root@confluence ~]chmod +x atlassian-confluence-7.4.1-x64.bin
|
- 执行安装,会有三个确认,默认即可
 1
 2
 3
 4
 5
 6
 7
 8
 9
10
11
12
13
14
15
16
17
18
19
20
21
22
23
24
25
26
27
28
29
30
31
32
33
34
35
36
37
38
39
40
41
42
43
44
45
46
47
48
49
50
|
[root@~]# ./atlassian-confluence-7.4.1-x64.bin
Unpacking JRE ...
Starting Installer ...

This will install Confluence 7.4.1 on your computer.
OK [o, Enter], Cancel [c]
o
Click Next to continue, or Cancel to exit Setup.

Choose the appropriate installation or upgrade option.
Please choose one of the following:
Express Install (uses default settings) [1],
Custom Install (recommended for advanced users) [2, Enter],
Upgrade an existing Confluence installation [3]
1
The following default options cannot be used. You will be asked to provide alternatives for these options.
* Home Directory (Existing home directory)


Default location for Confluence data
[/var/atlassian/application-data/confluence]


See where Confluence will be installed and the settings that will be used.
Installation Directory: /opt/atlassian/confluence
Home Directory: /var/atlassian/application-data/confluence
HTTP Port: 8090
RMI Port: 8000
Install as service: Yes
Install [i, Enter], Exit [e]
i

Extracting files ...


Please wait a few moments while we configure Confluence.

Installation of Confluence 7.4.1 is complete
Start Confluence now?
Yes [y, Enter], No [n]
y

Please wait a few moments while Confluence starts up.
Launching Confluence ...

Installation of Confluence 7.4.1 is complete
Your installation of Confluence 7.4.1 is now ready and can be accessed via
your browser.
Confluence 7.4.1 can be accessed at http://localhost:8090
Finishing installation ...
|
破解
破解过程主要参考这里,感谢大佬。
-
准备atlassian-agent.jar
1
2
|
[root@confluence ~]# unzip atlassian-agent-v1.2.3.zip
[root@confluence ~]# cp atlassian-agent-v1.2.3/atlassian-agent.jar /opt/atlassian/
|
-
设置JAVA_OPTS,启用java代理
1
2
3
|
[root@confluence ~]# vim /etc/profile
#文件属追加一行
export JAVA_OPTS="-javaagent:/opt/atlassian/atlassian-agent.jar ${JAVA_OPTS}"
|
-
source /etc/profile 使用环境变量生效
-
/etc/init.d/confluence restart 重启服务
-
ps -ef |grep java|grep agent验证agent是否已经工作
-
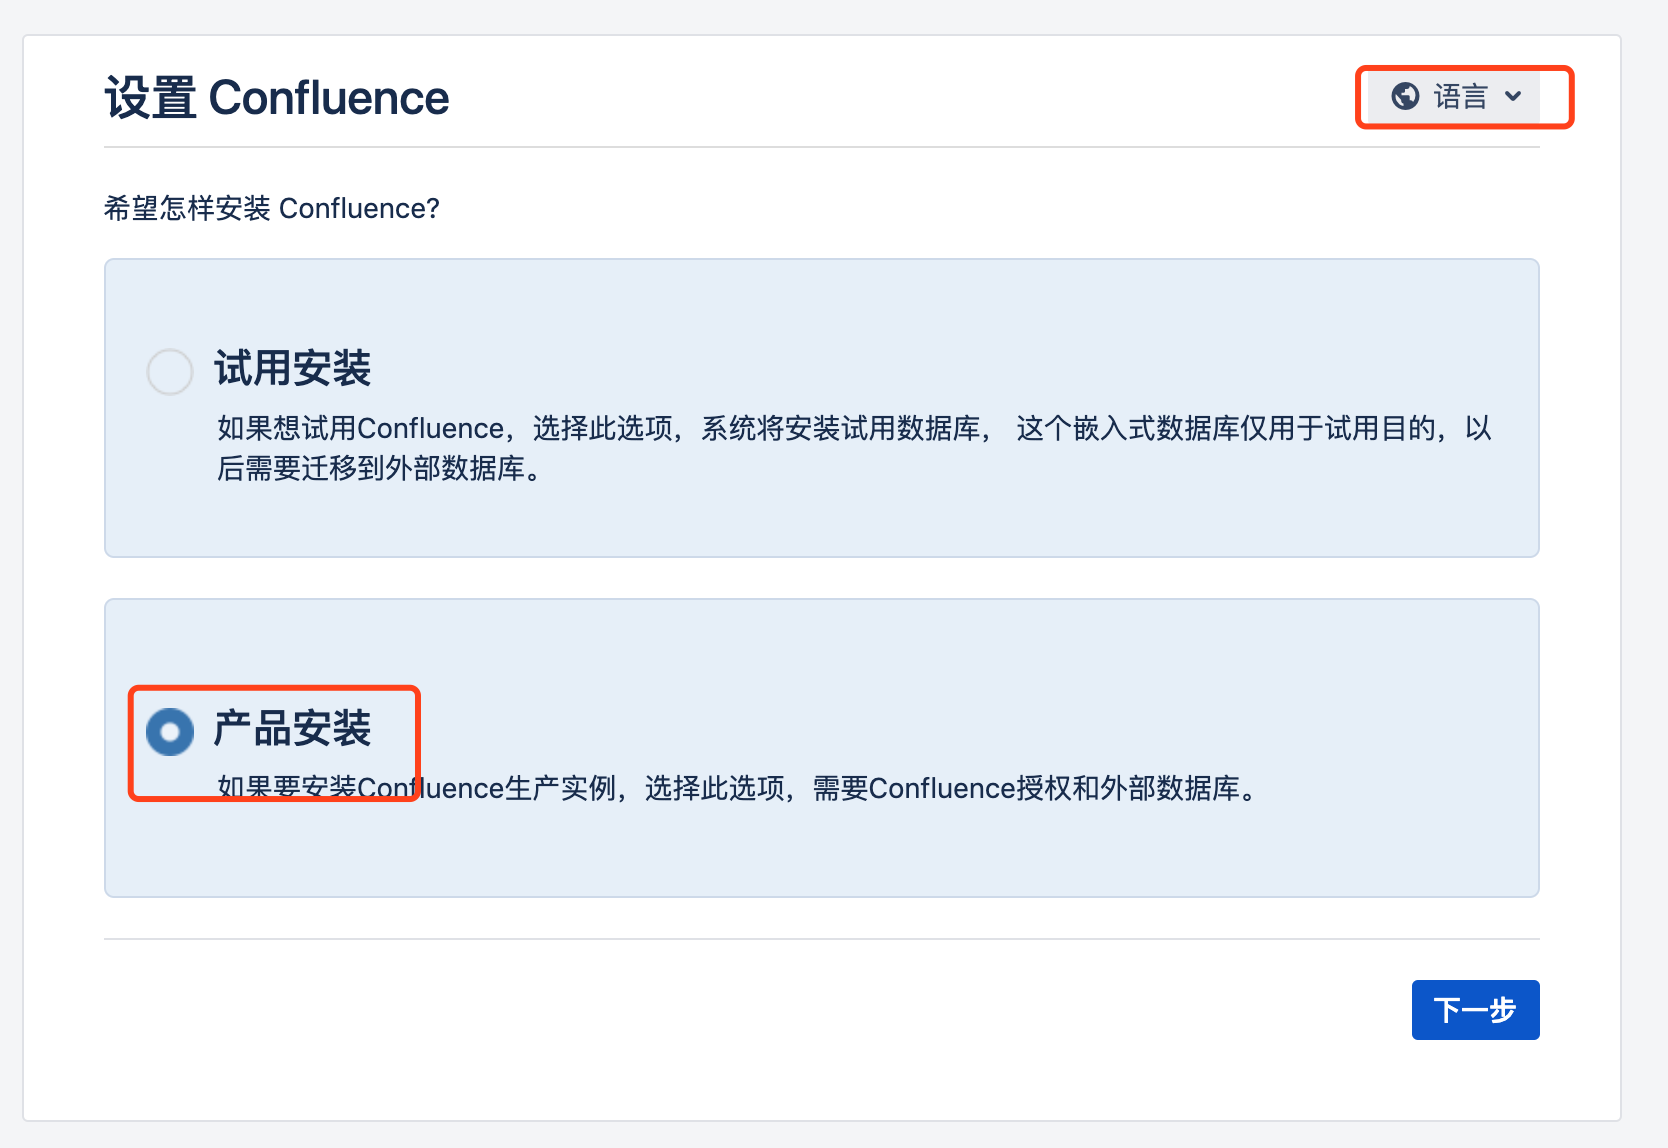
浏览器访问 ip:8090 开始安装
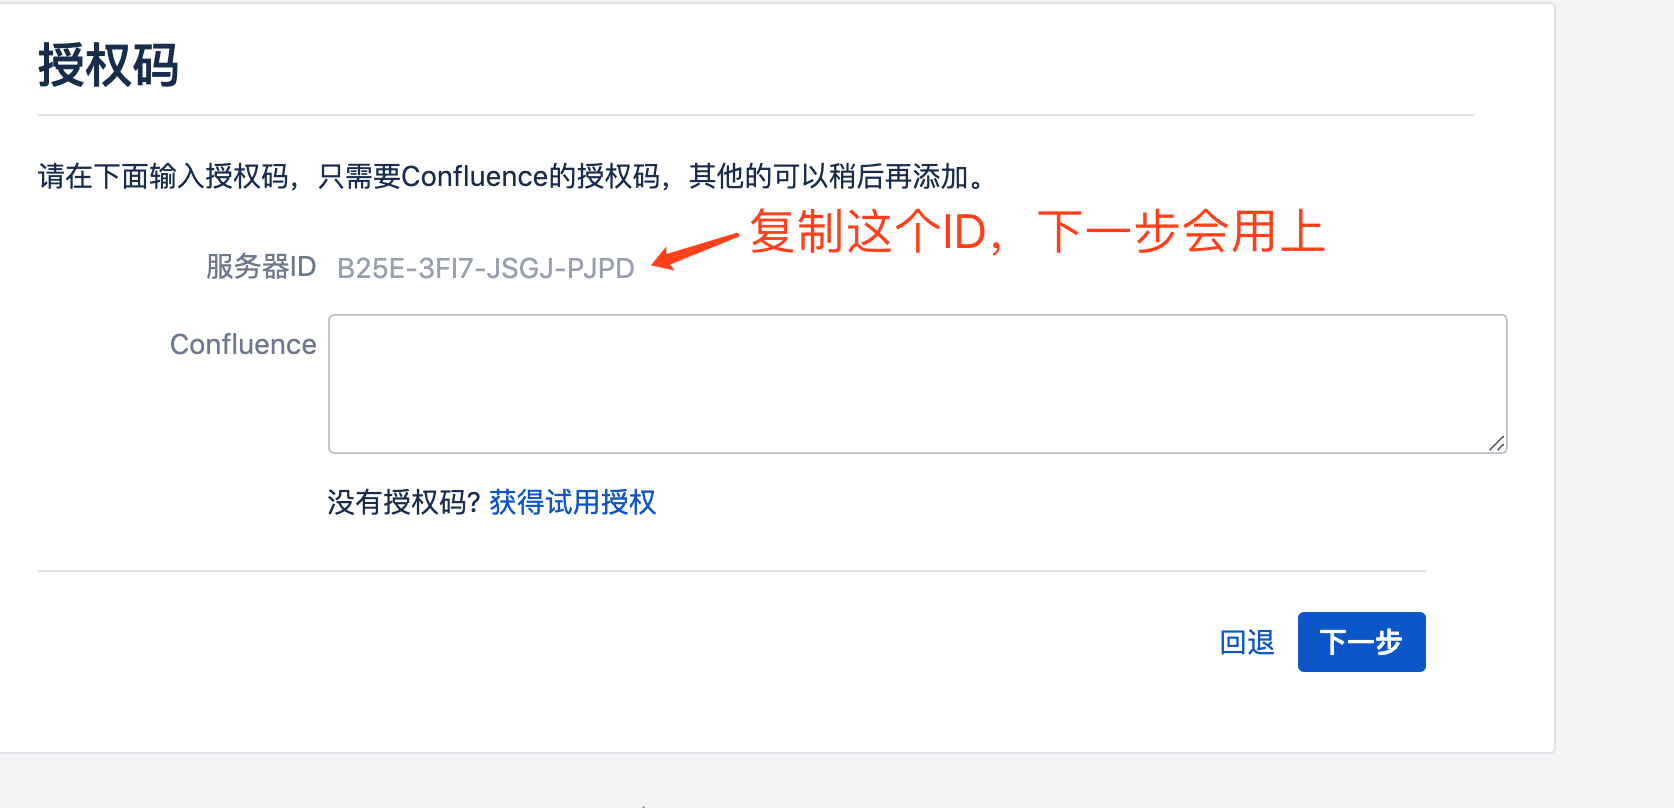
7.生成授权码,B25E-3FI7-JSGJ-PJPD 即上一步中的服务器ID
 1
 2
 3
 4
 5
 6
 7
 8
 9
10
11
12
13
14
15
16
17
|
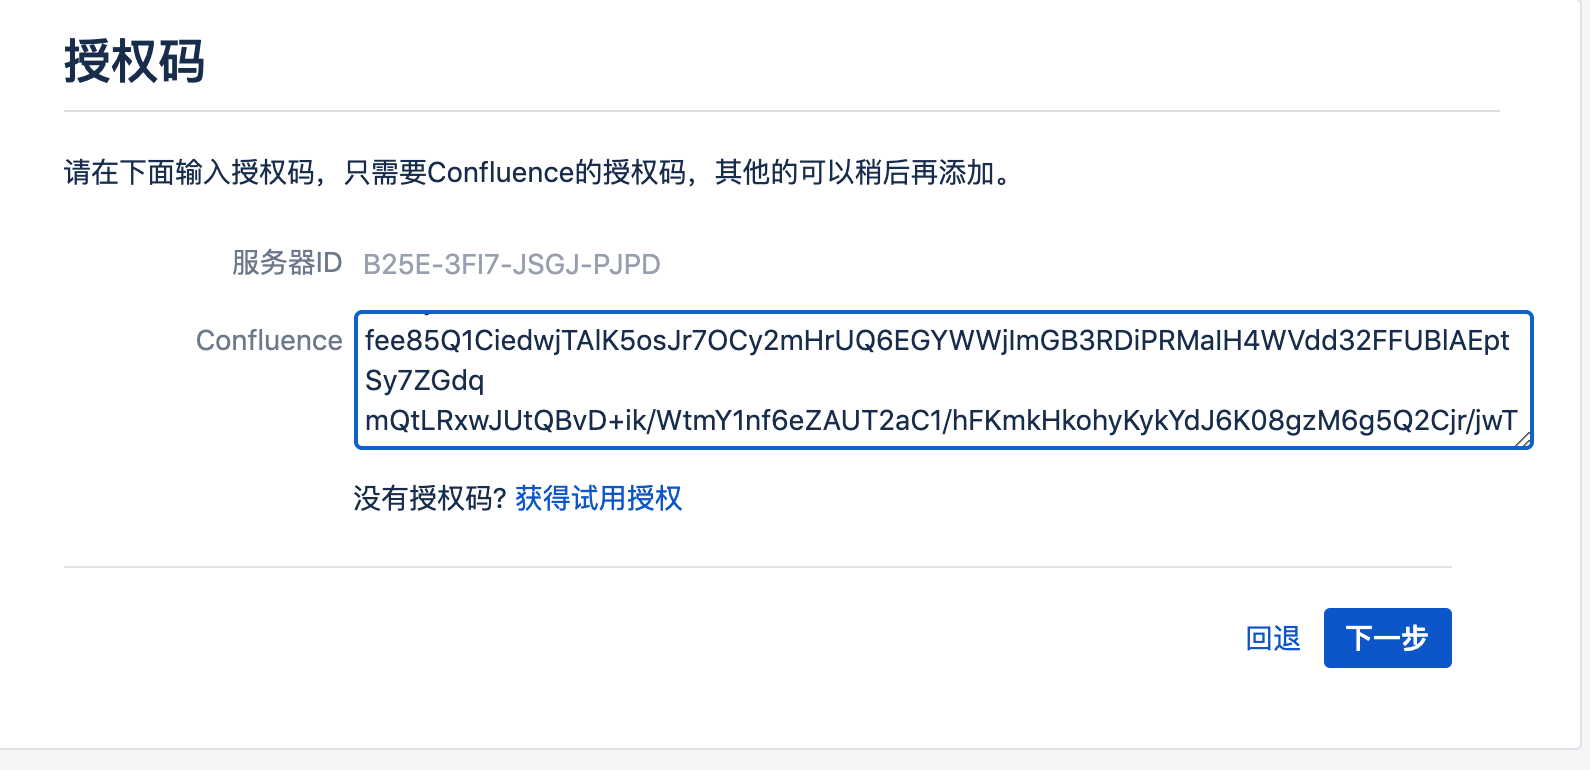
[root@confluence ~]# java -jar /opt/atlassian/atlassian-agent.jar -p conf -m xnile@dianduidian.com -n xnile -o xnile -s B25E-3FI7-JSGJ-PJPD

====================================================
=======        Atlassian Crack Agent         =======
=======           https://zhile.io           =======
=======          QQ Group: 30347511          =======
====================================================

Your license code(Don't copy this line!!!):

AAABOQ0ODAoPeJxtUNFugjAUfe9XNNlzFauOYdJkG3QLBNAM3XvF62wChbTF6L5+FfBlMWly03PvO
fee85Q1CiedwjTAlK5osJr7OCy2mHrUQ6EGYWWjImGB3RDiPRMaIH4WVdd32FFUBlAEptSy7ZGdq
mQtLRxwJUtQBvD+ik/WtmY1nf6eZAUT2aC1/hFKmkHkohyKykYdJ6K08gzM6g5Q2Cjr/jwTshpmX
g9SqEMnb2VSNvXAKazQFvR4Sw+lw+rttYVc1MDCdZbxrzB+S5FTUxaUUCXwSyv1dXT3EhDPdw+N3
DhiaRwVPCfpbBnMFwsv8H1vNkMF6DNo136nS07mH7FPkuIzIZtkE93Jj5U3nS5PwsD/PMegvkGbW
xx08JB39R70+rgzDmfELeY5e3DPGFPvs0/pDzW5mFcwLAIUAk6VT2B7uwBFZ6HQT4arsPvDxrACF
Egsx5zwzjP1I35AX3mfw3fZGlL+X02fj
|
8.复制上边的授权码
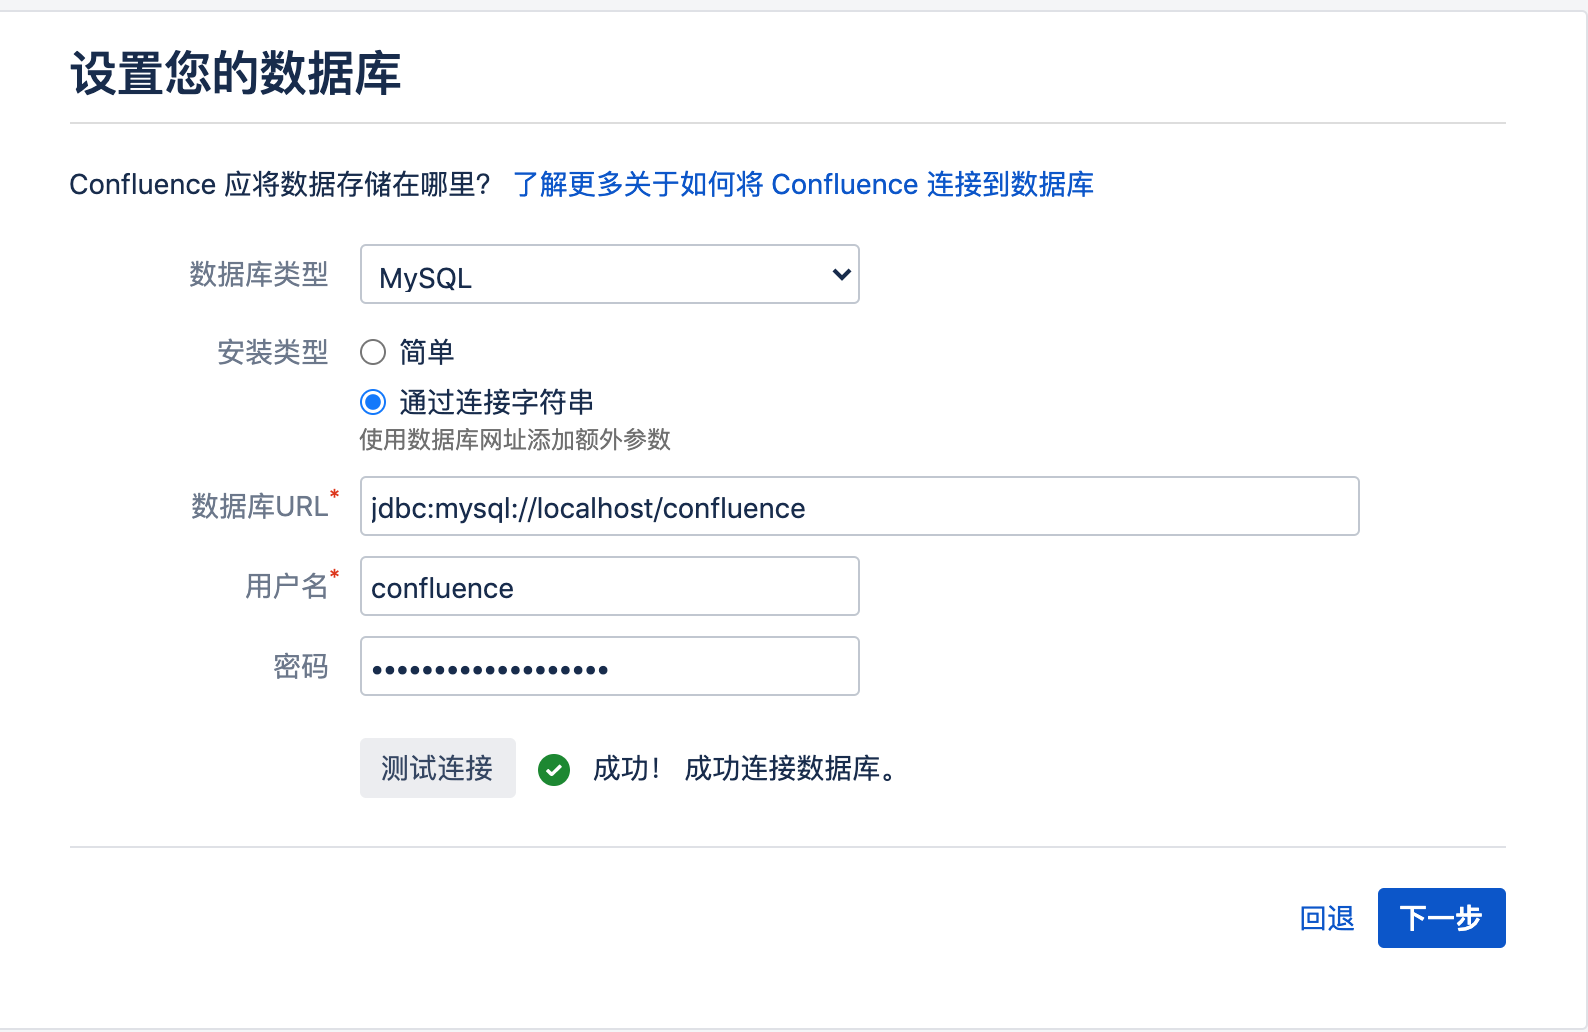
9.设置数据库

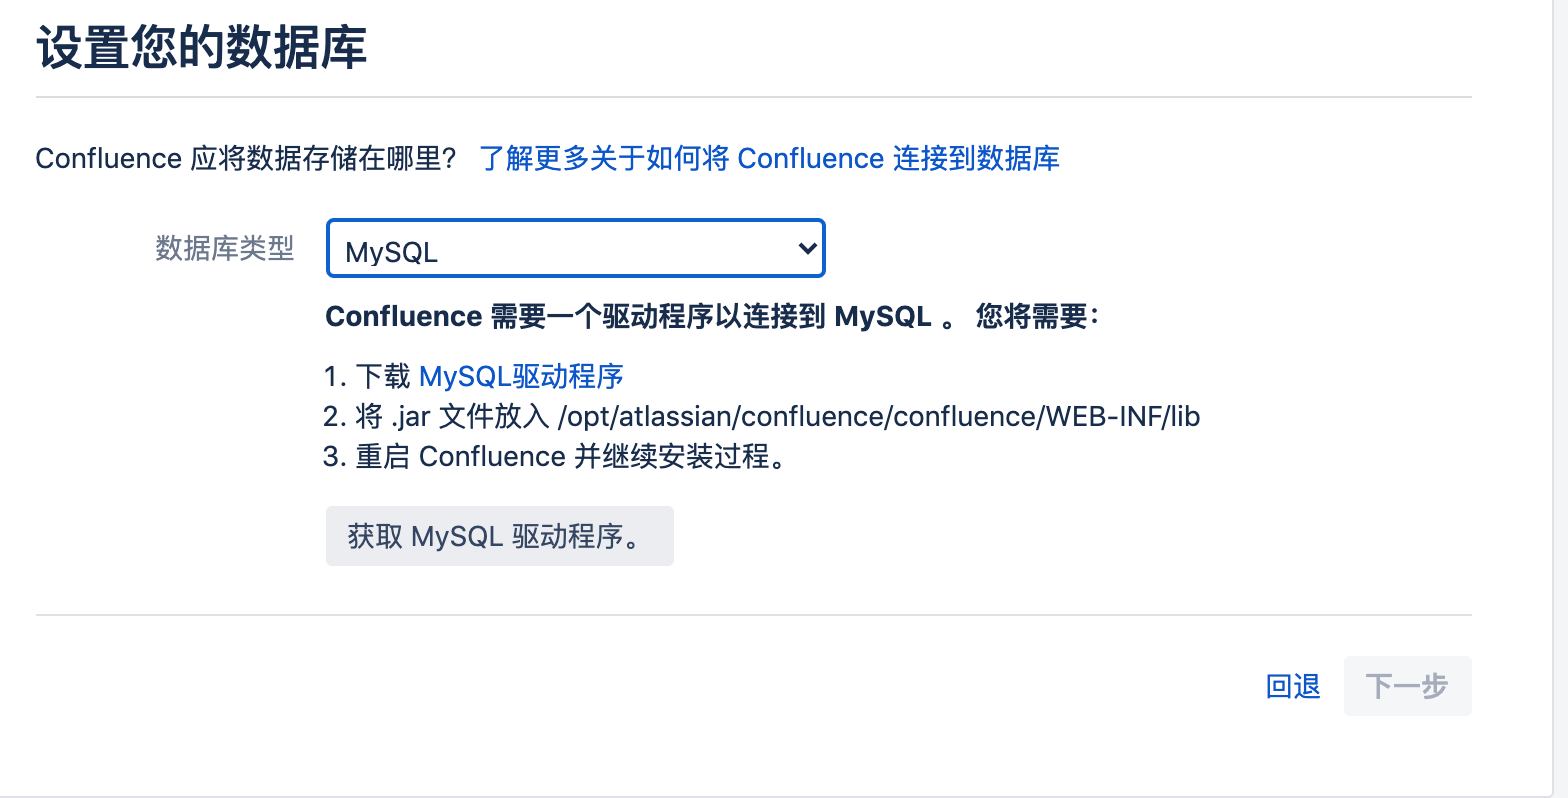
根据提示中的链接下载和安装mysql驱动
1
2
|
[root@confluence ~]# cp mysql-connector-java-5.1.49/mysql-connector-java-5.1.49.jar  /opt/atlassian/confluence/confluence/WEB-INF/lib
[root@confluence ~]# /etc/init.d/confluence restart
|
回到刚才的界面刷新继续配置
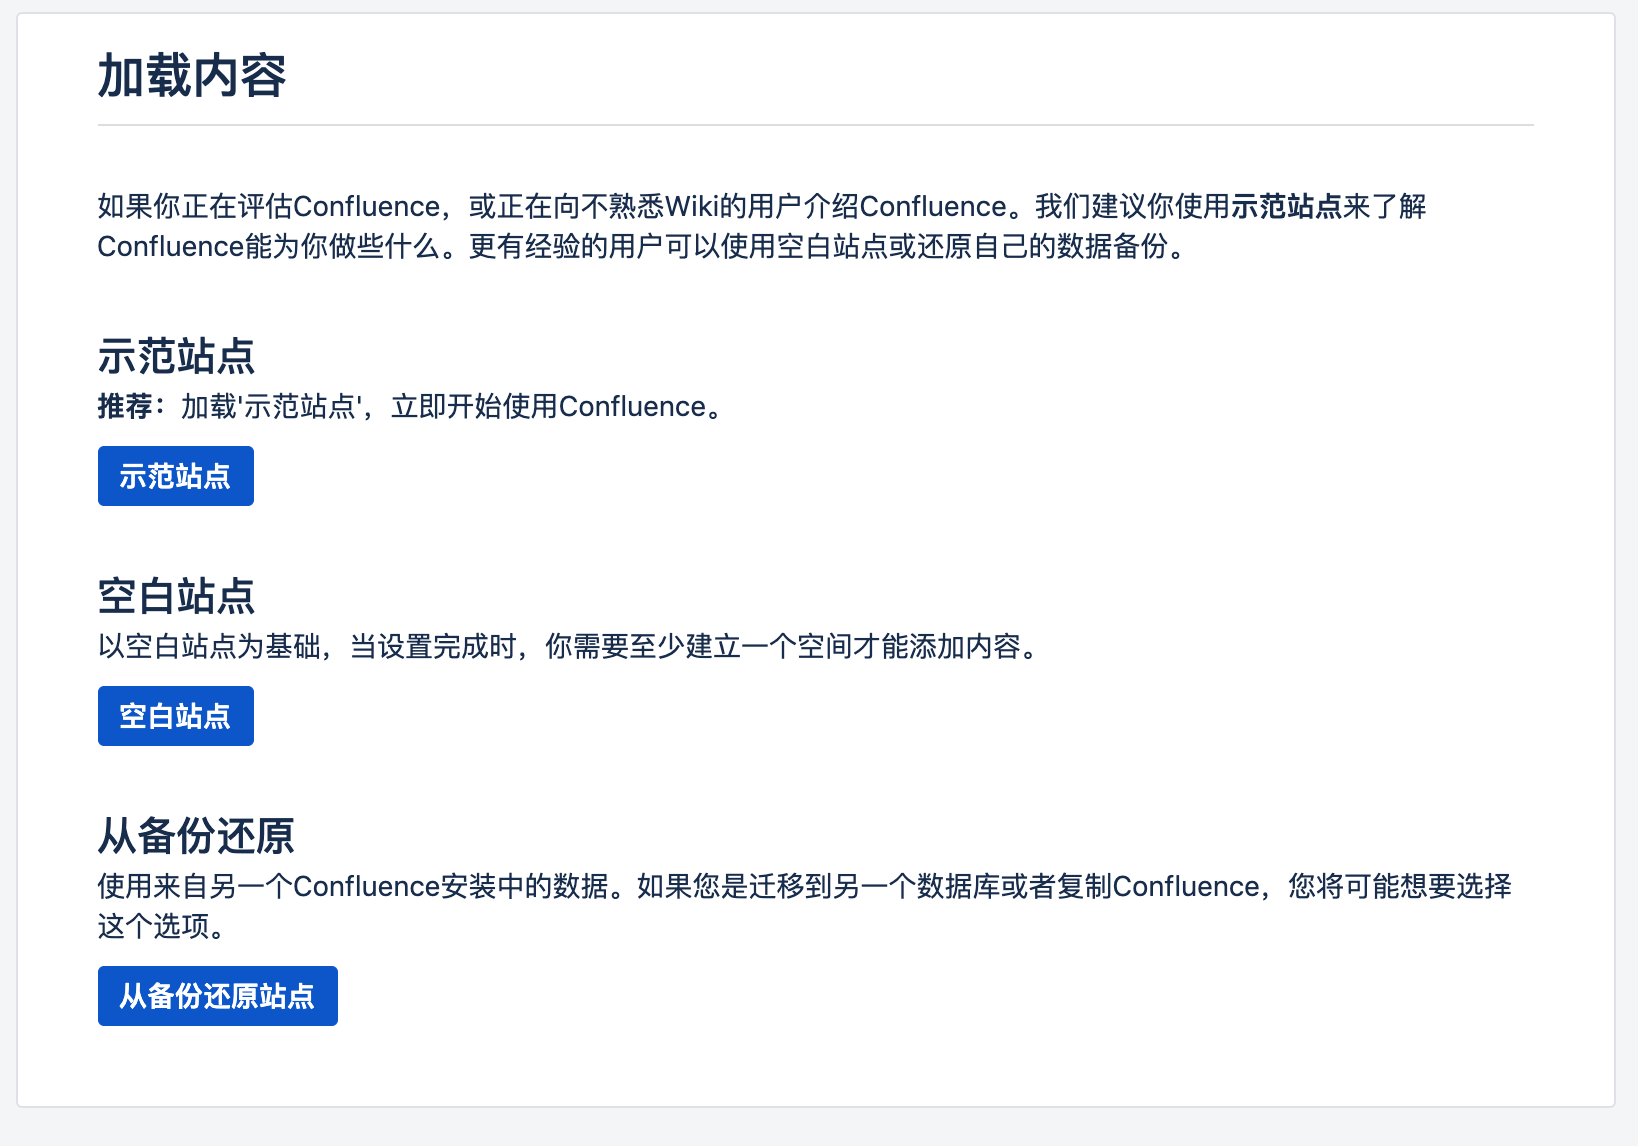
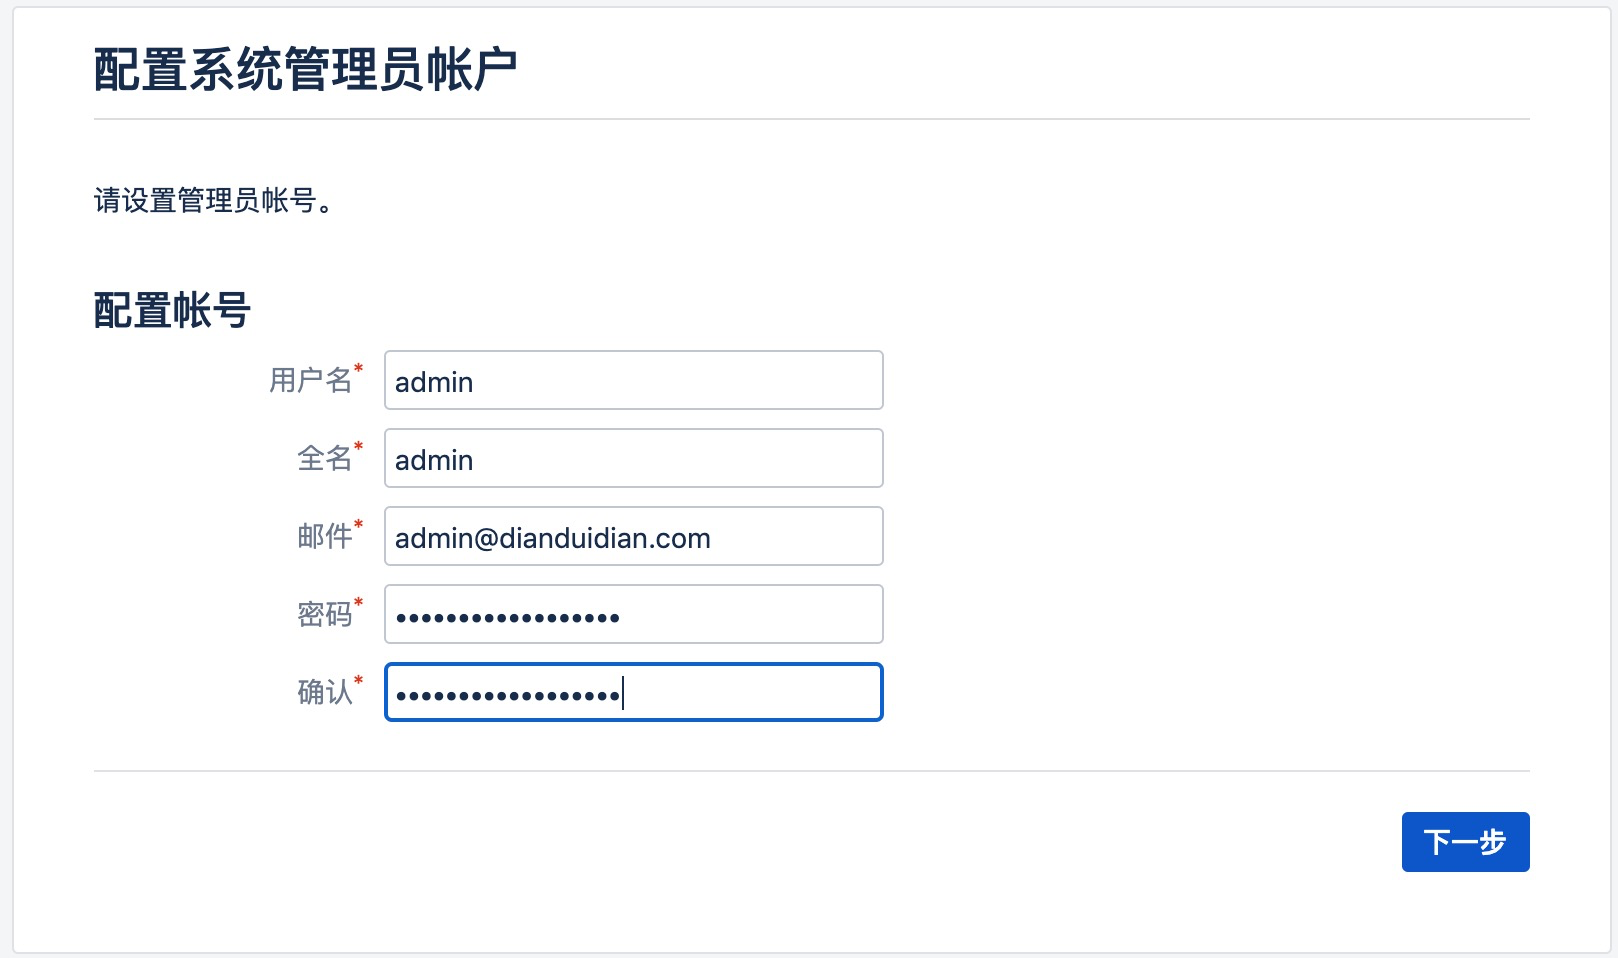
10.创建管理账号
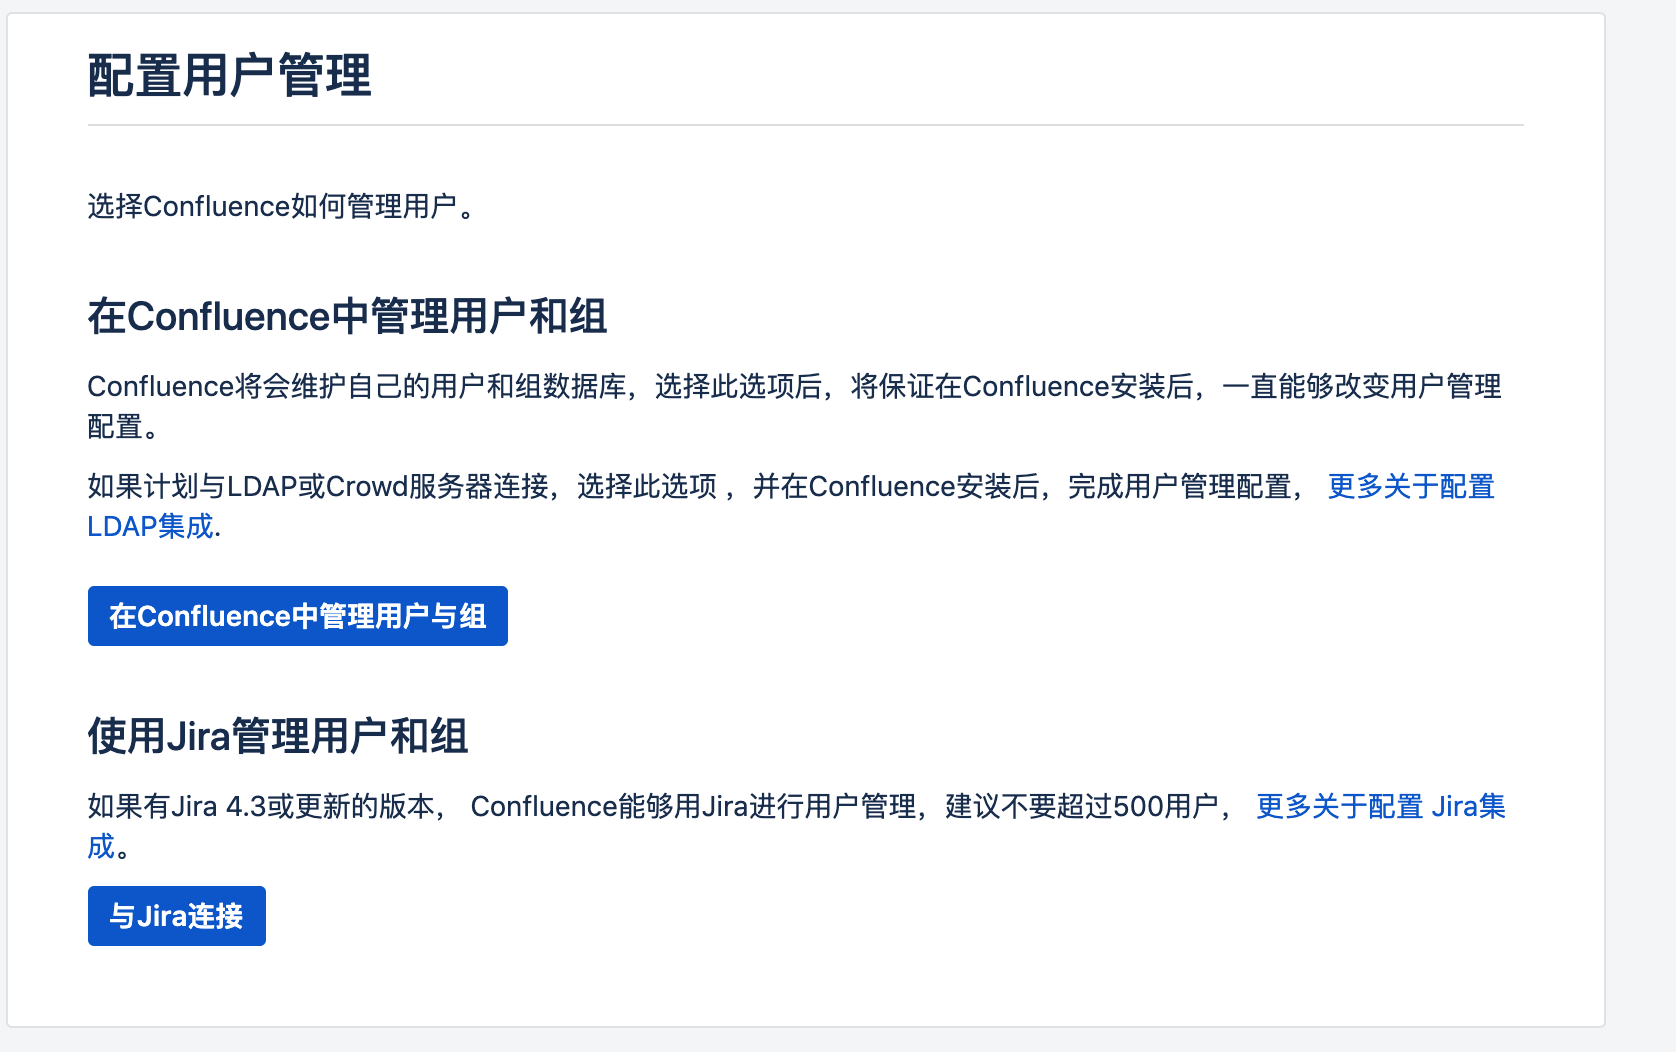

11.完成安装

参考
https://gitee.com/pengzhile/atlassian-agent
https://confluence.atlassian.com/doc/database-setup-for-mysql-128747.html
https://confluence.atlassian.com/doc/supported-platforms-207488198.html#SupportedPlatforms-Databases